
Lasershow Recording with an iPhone
This page will detail the steps needed to record a laser show to an iPhone/iPad. After a show is recorded, there are several additional steps necessary to render the show for playback.
The following items are needed:
The following items are needed:
- iPhone or iPad running iOS 10.3 or later
- MultiTrack DAW (Apple App Store)
- Apple USB 3 Camera Kit
- Wave-USB or MiniDSP USBStreamer
- PC with wireless connectivity to iPhone/iPad
- Audacity audio processing software
I have explored two available methods for recording a laser show. The first is to simply connect the Wave-USB to your iPhone/iPad thru the Apple USB 3 Camera Kit, the second is to connect the MiniDSP USBStreamer in place of the Wave-USB. Using the USBStreamer allows for a direct ADAT optical connection to your iPhone to capture pre-recorded laser shows from ADAT tape.
One thing to remember, the current code release for the USBStreamer doesn't allow changing the clock source when attached to an iPhone and by default the Streamer will use its own internal clock. This will cause drop outs in the recording! It is necessary to connect both optical in and optical out from the Streamer to your ADAT and set the ADAT to use an external clock. The Wave-USB does not have this clocking issue.
Once you have your recording device attached to your iPhone/iPad, open the MultiTrack DAW app.
Recording

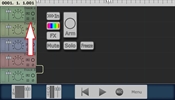
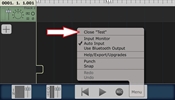
When you first open the app, the last recording session will be displayed. To start a new recording, select the Menu button, then close.
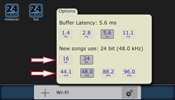
From the main menu, select the Settings icon and make sure the recordings are set for 24bit at 48K.
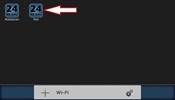
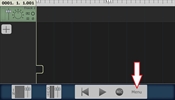
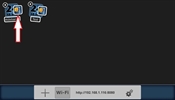
Select the '+' sign to create a new recording, this will prompt for a new song name. You will now have an additional icon on the main menu that should reflect the settings in the previous step.. Select the new recording to open the timeline.
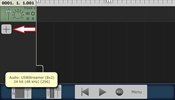
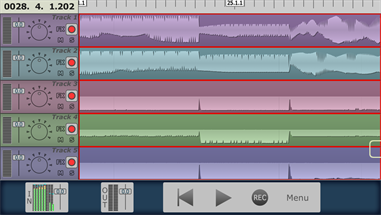
From the timeline, you will need to click the + button to add additional tracks. You will want to open a total of 8 tracks.
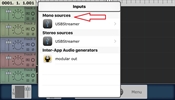
Next, you will need to assign the USBStreamer input channels to the recording tracks. Tap the word 'FX' on each track, this will bring up a zoomed image where you can arm the track, change the color, add FX or assign an input. Select the '>>>In' icon. From here select the Mono channels of the USBStreamer.
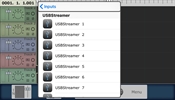
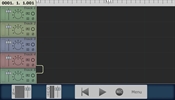
It is very important to match the recording track to the input channel. So for track 1, you will want to select >>>In, Mono Channels, USBStreamer 1. You will need to do this for all 8 channels. Once complete, you will also want to 'ARM' the track.
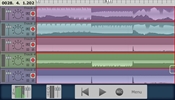
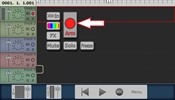
Select the record button, then the play button to begin the recording. Select recording and play again to finish the recording. When complete, select Menu and Close (Song Name) to return to the main menu.
Offloading and Rendering
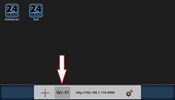
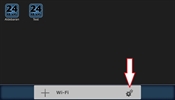
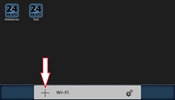
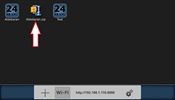
For this procedure, you will need WiFi access between a PC and your iPhone/iPad. From the main menu, select the WiFi button and make note of the IP address.
Place your finger on the project you wish to offload until the icons begin to move. You will have the option to either delete the project or compress the project for easy offloading. Tap the compression option and a new icon will appear with the same name.
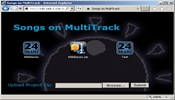
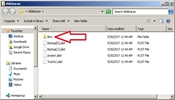
On your PC, open a web browser and type in the web address listed in the MultiTrack DAW app. Be sure to include the :8080 at the end of the address. From the web interface, select the .zip file you created earlier and download the file to your PC. Decompress the .zip file and find the 'Bins' folder.
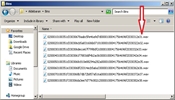
From the 'Bins' folder you will find the 8 individual tracks from the recording. The last number in the file name indicates the track.
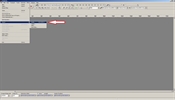
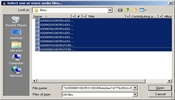
Next, open Audacity, select File, Import and Audio. Browse to the Bins folder and select the first file listed (track 1), hold down the shift key and select the last file listed (track 8). This will ensure the tracks are imported in the proper order.
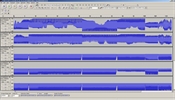
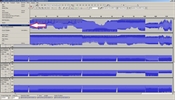
Now that all 8 individual tracks have been loaded in Audacity, it will need to be rendered as a single multi-channel file. Select File and Export Audio. Choose a file name and select OK.
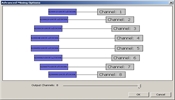
If you do not receive the image shown to the right, then you will need to return to Audacity, select Edit and Preferences. Select the Import/Export tab and select the bullet for 'Use Custom Mix'.
You have now created a multi-channel wave file that is ready for playback. The playback device can be as simple as a modified sound card DAC to the more complex Wave-USB. For information on playing the file on your iPhone/iPad, please click here.