Wave Lasershow Playback with the ADAT to ILDA Converter
Here I will discuss how to playback a pre-recorded laser show with the ADAT to ILDA Converter using either a PC or Mac computer. One benefit of the wave file format for laser shows has been the ease of changing the "playlist" associated with the show you are running. On the fly, with no interruption at all, you can change the next song that will play in the list, add or delete additional songs in a show. There are a number of applications available that are capable of playing 8 channel wave files.
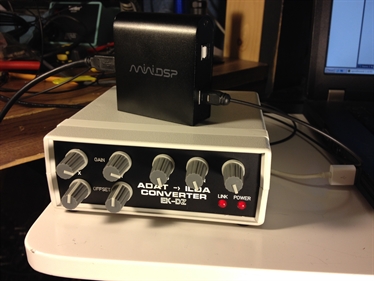
Before we have a look at playback via software, lets have a look at the hardware required. Aside from having the ADAT to ILDA Converter, you will also need an adapter that has ADAT Optical. The MiniDSP USB Streamer is an awesome solution for this purpose. Not only will this work for PC, it'll also work on a Mac computer as well. There are many other PCI and PCIe adapter card that support the ADAT Optical standard and should work with the ADAT to ILDA Converter. So far, the E-MU 1212m has been tested and works very well.
Before we have a look at playback via software, lets have a look at the hardware required. Aside from having the ADAT to ILDA Converter, you will also need an adapter that has ADAT Optical. The MiniDSP USB Streamer is an awesome solution for this purpose. Not only will this work for PC, it'll also work on a Mac computer as well. There are many other PCI and PCIe adapter card that support the ADAT Optical standard and should work with the ADAT to ILDA Converter. So far, the E-MU 1212m has been tested and works very well.
Setup of the E-MU 1212m
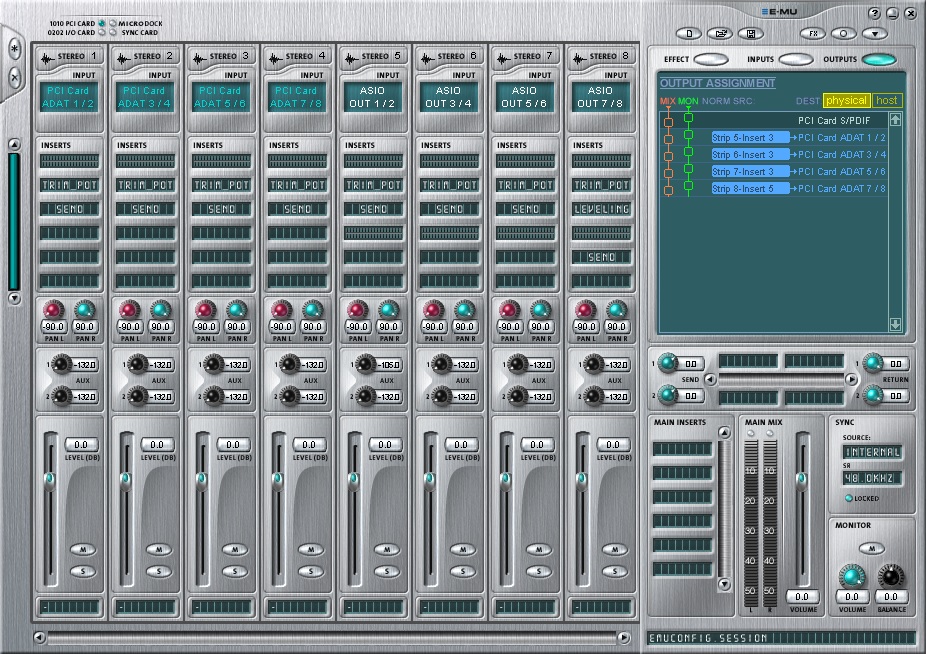
Above is the E-MU PatchMIX DSP Console and the best configuration settings to take full advantage of the cards features. The first four sections, labelled Stereo 1, 2, 3 and 4 are for the ADAT Optical input. Stereo 5, 6, 7 and 8 represent ADAT Optical output. Each stereo section represents 2 ADAT channels for example, stereo 5 represents X and Y output.
Just beneith Stereo 5 we see ASIO Out 1/2 and under that are the inserts. The inserts perform a function to the channel data prior going out to the ADAT to ILDA Converter. The first insert is just a VU meter, next is a trim pot, so the output image size can be adjusted on X and Y by adjusting this trim pot in software. Under that is the send, this sends the data to the ADAT Optical port and out to the ADAT to ILDA Converter. If you look at the Stereo 8 channel, which represents the left and right audio on the ADAT to ILDA Converter, you will also see a leveling insert, right before the data gets sent to the ADAT Optical port. This leveling insert is an automatic gain control feature in the E-MU software. By applying this insert, shows recorded at different audio levels will by adjusted dynamically so that all your shows sound roughly the same in volume. A rather nice feature of the E-MU software!
Click the link below to download the E-MU PatchMIX DSP Console config file to help get you started. Once loaded, your console should match the screen shot above. Click here to download the E-MU config file.
Setup of the MiniDSP USBStreamer
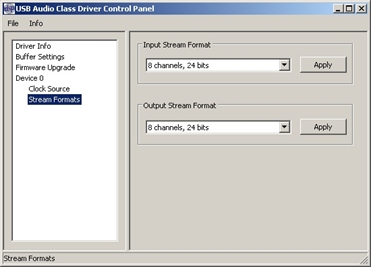
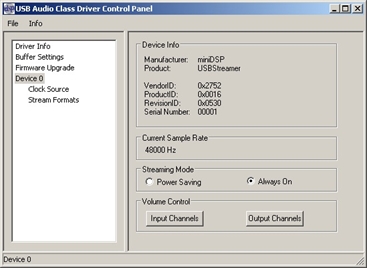
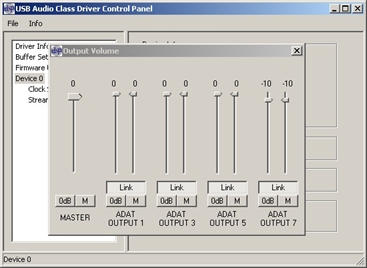
The configuration of the MiniDSP USBStreamer is far less complex than the E-MU. Once installed, it's important to make sure the Output Stream Format is set for 8 channels at 24-bit. Next, by selecting Device 0, then Output Channels, you have control over the output levels of the individual ADAT channels. You can see from the pic to the right, that I have the left/right audio channels down -10dB. By default, the Streaming Mode will be set to Power Saving. It is recommended that this be changed to Always On.
Now that the ADAT Optical interface is configured, it's time to setup the playback software.
Playback of an 8 channel wave file relies completely on ASIO. There's quite a few programs that supports ASIO. So far I have tested Winamp and Foobar2000, both applications perform very well. Here we will take a look at the configuration of Foobar2000. After downloading and installing Foobar2000, you will also need to download and install ASIO support for Foobar. The ASIO support component can be downloaded here.
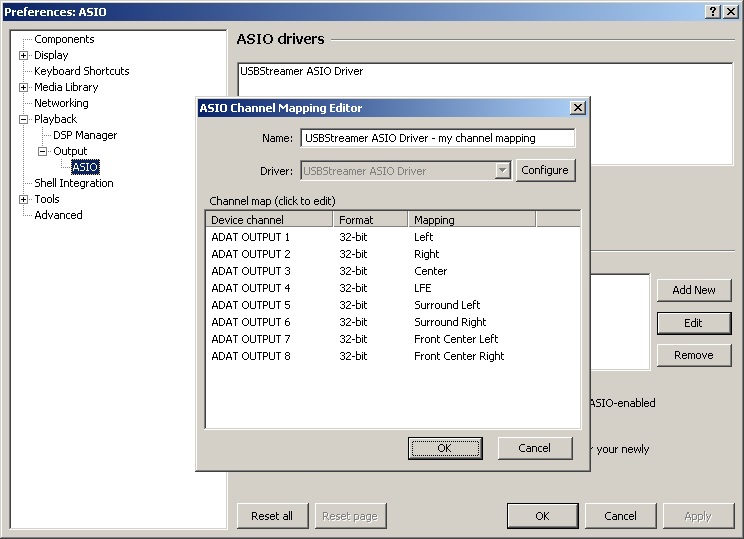
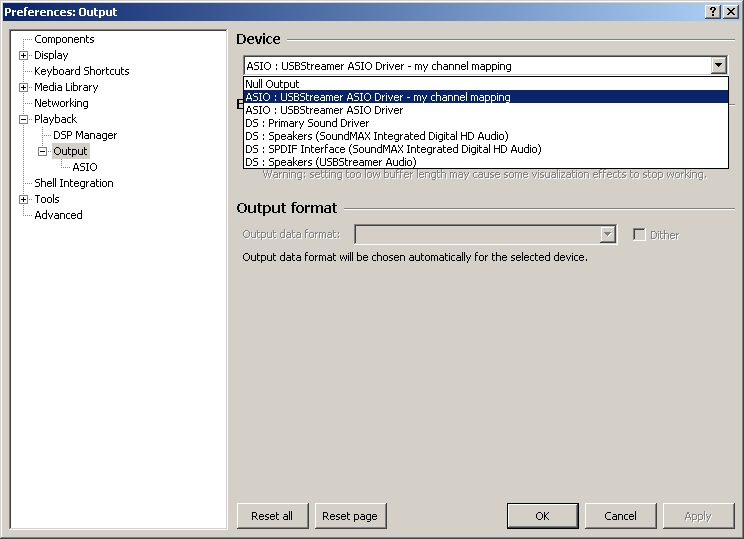
After installing ASIO support, you will next need to create an ASIO mapping. Set the output mapping the same way as listed in the pic below, then on the output section change the device to "ASIO: *E-MU or MiniDSP* ASIO Driver - my channel mapping".
After installing ASIO support, you will next need to create an ASIO mapping. Set the output mapping the same way as listed in the pic below, then on the output section change the device to "ASIO: *E-MU or MiniDSP* ASIO Driver - my channel mapping".
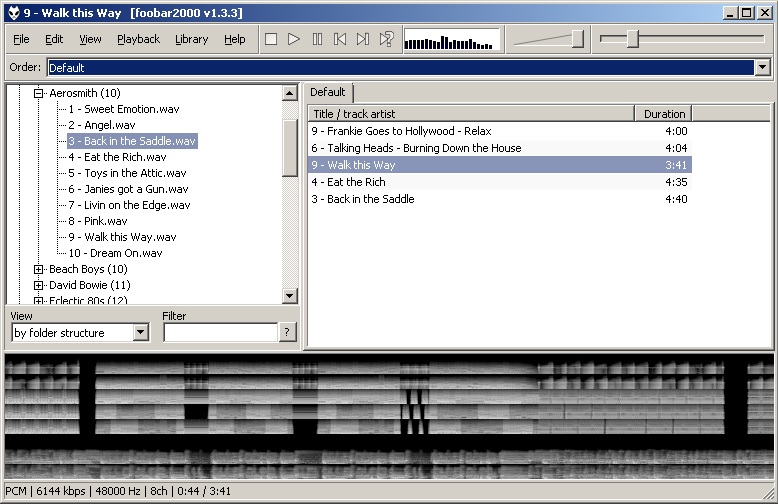
You should now be ready to play back wave laser show! Below is a screen shot of Foobar2000 in action. On the left is my library of laser shows, on the right is the current playlist (drag and drop from left to right) and the very bottom shows a type of representation of the output ADAT channels. There are 8 channels, channel 6 is blank and the bottom two show the audio.