
Advanced Laser Router with Beyond
Using the Router with Pangolin Beyond has proven to work very well. You can select different frames and animations to display while also manipulating the DMX channels. Individual cues can be created to that will turn on/off a particular feature of the Router or cycle and DMX steps can be programmed to create chases or a number of other effects. The Beyond Timeline can also be programmed to update the DMX channels for different effects.
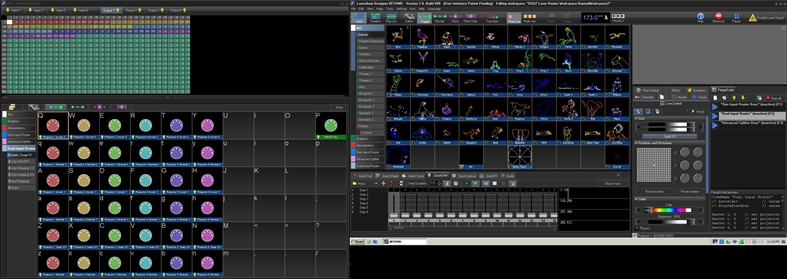
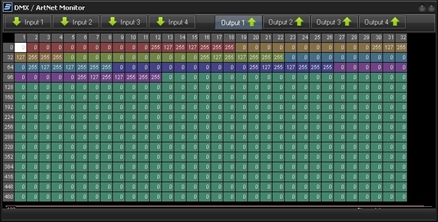
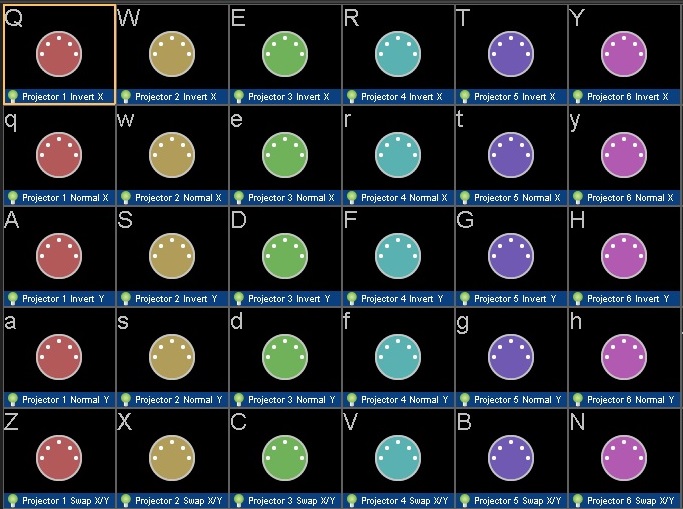
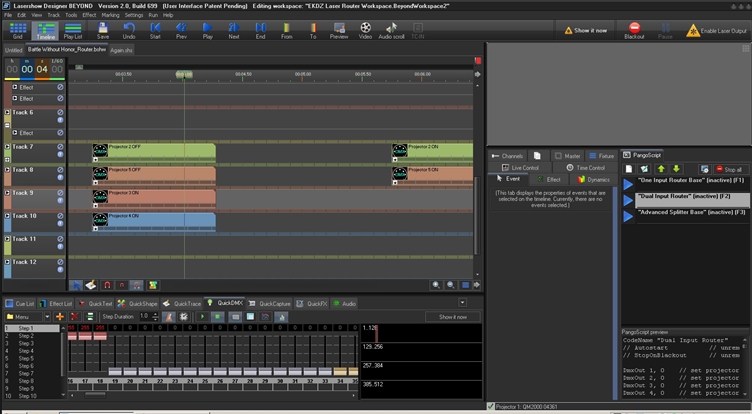
In the image above, you can see that I have a 2nd workspace open on the left side. This is where I have a number of pre-programmed DMX effect. Some are chases while others simply turn something on or off. To the right is a closer look at the DMX monitor. This is where you can see the DMX addresses being changed when different cues are executed. You may notice the six different colored sections, these corespond to the 6 outputs of the Router.
In order to use Beyond, or any other software to control the Router, it's important to understand the 'base setting' of the Router when in a DMX enabled mode. For this example, the Router will be in Dual Input mode. In this mode the output channels of the Router rely completely on DMX address values. If all values are zero, none of your projectors will display anything played from Beyond. At the very minimum, X/Y offsets should be centered and X/Y RGB gain should be set to max via DMX commands.
With Beyond, the easiest way to occomplish this is with PangoScript. A PangoScript can be written that will activate during the initialization of Beyond. This PangoScript can also be activated at any time while running Beyond, this will reset the DMX address values to a level that you define as default.
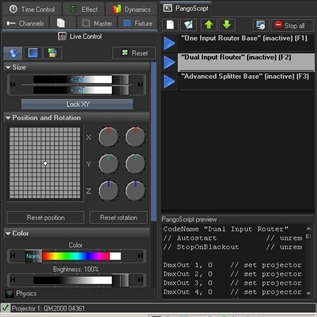
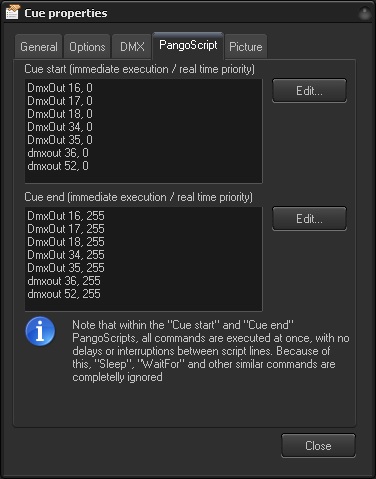
In the pic to the right, you'll notice the three basic PangoScripts that were written to center all outputs and set X/Y RGB gain to max. The three different scripts were written for the three Router personalities that support DMX. Below is a closer look at the PangoScript for 'Dual Input Router' mode.
In the pic to the right, you'll notice the three basic PangoScripts that were written to center all outputs and set X/Y RGB gain to max. The three different scripts were written for the three Router personalities that support DMX. Below is a closer look at the PangoScript for 'Dual Input Router' mode.
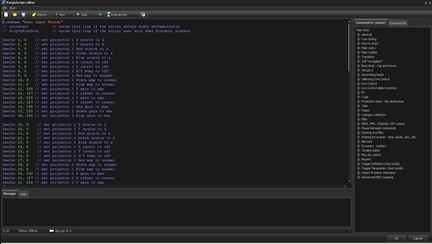
We will now take a look at how a DMX cue is created for the Router. One important concept, the DMX changes we commited with PangoScript above will take priority over all else. So if we wanted to create a cue that turns RGB off on projector 1, we would first need to execute another PangoScript that would set the DMX address values for RGB to 0. This by itself would be enough to simply turn off RGB on projector one but if the cue has steps created with QuickDMX and perhaps does some sort of projector chasing then all projectors used in the chase would need to have a PangoScript executed that sets the RGB gain DMX address to a value of zero. If you right click and edit a DMX cue you will find a tab for PangoScript, this is where you would write a script to prepare the DMX channels to be manipulated by the cue.
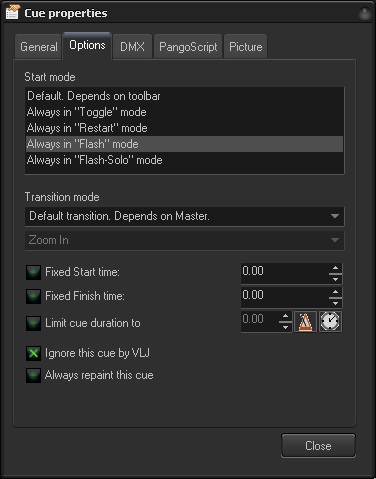
The above pic shows the cue settings. On the options tab for a cue that will invert X or change signal input, this type of cue is best triggered with an "Always in Flash Mode" setting. A chase effect is best done in the "Always in Toggle Mode".
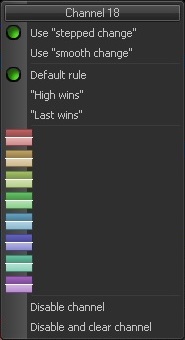
When programming steps in QuickDMX, you may specify if a DMX channel will be stepped from one value to the next or if the change will be "smooth". A projector chase where the projectors are flashing on/off to the beat of the music would be a stepped change. A projector chase where the projectors are quicking fading up/down to the beat of the music would be a smooth change setting.
DMX cues may also be used on the Beyond timeline! Just drag and drop the cues needed to the timeline!
The following zip file contains the base PangoScript code to support the Router with Beyond. Also, I have included the TouchOSC template and Beyond OSC Server Map to allow configuring the Router via an iPad.
The following zip file contains a base PangoScript to support the Router along with midi map, osc map and se veral Beyond Workspace pages. These files are specifically for running the Router in Dual Input Mode. Also contains a pdf file with instructions for installing and using the code.