
ADAT to ILDA Converter (A2IC)
The ADAT to ILDA Converter was designed very versatile playback device. The ADAT Optical specification calls for up to 8 channels at 48KHz sample rate and up to 24-bits of resolution. The A2IC converts and conditions this optical signal to an electrical signal and allows for simple connection to your laser projector. The following table shows the ADAT channel assignments to the pinout of the ILDA DB-25.
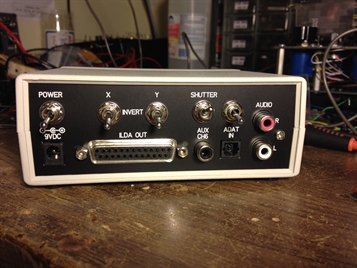
- Converted to differential and clamped at +/-5V, connects to ILDA pin 1, 14 (+X/-X)
- Converted to differential and clamped at +/-5V, connects to ILDA pin 2, 15 (+Y/-Y)
- Clamped at 0 to +5V, connects to ILDA pin 5 (Red)
- Clamped at 0 to +5V, connects to ILDA pin 6 (Green)
- Clamped at 0 to +5V, connects to ILDA pin 7 (Blue)
- Auxilliary, user selectable
- AC coupled, left audio (Can be DC coupled via jumper setting)
- AC coupled, right audio (Can be DC coupled via jumper setting)
*It is important to power off the converter prior to seating or unseating the optical cable.
ILDA pin 4 and 17 are tied together in the A2IC. The Shutter switch, located on the rear of the converter, is a 3 postion switch. Center sets no output to ILDA pin 13, the up position sends a +5V signal to ILDA pin 13 and the down position depends on an internal jumper setting within the converter. If you decide to use ADAT channel 6 as a shutter signal, with the internal jumper for channel 6 set to shutter, the down position of the external switch will pass the signal thru to ILDA pin 13.
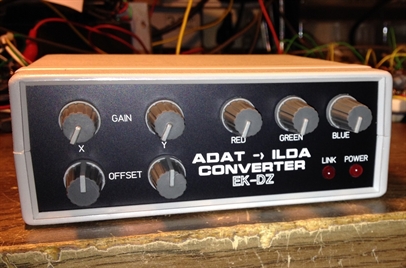
There are a number of pin headers on the main board to help configure the converter to your needs. Lets first cover the potentiometer pin header for the folks that have purchased the OEM version.
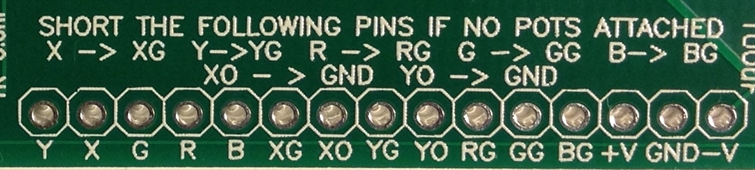
If you do not wish to connect potentiometers to the circuit board, you will need to short the specific pins above. If you do not short, or connect these pins to a potentiometer, no signal will be present on the ILDA connector. X, Y, R, G and B connect to one side of the potentiometer while XG, YG, RG, GG, and BG connect to the wiper of a potentiometer. For the position offset potentiometers, connect +V and -V to either side and XO and YO to the wiper of the potentiometer. 50K potentiometers are recommended.
Location of jumper settings
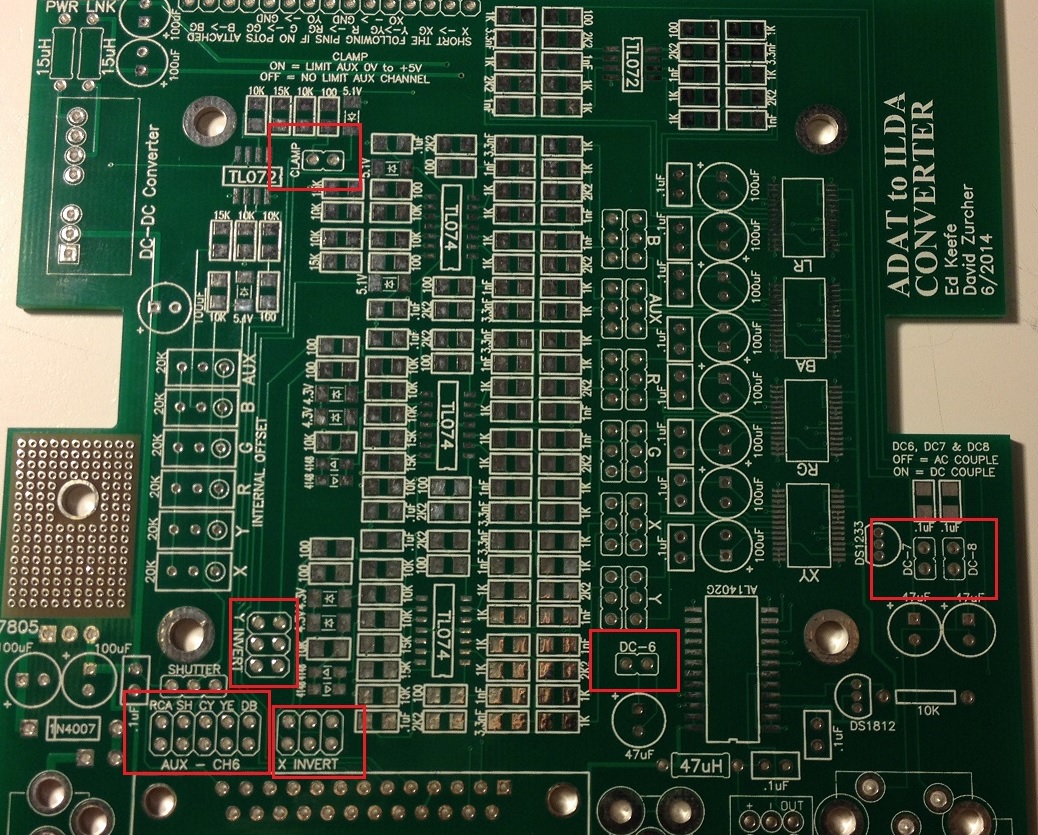
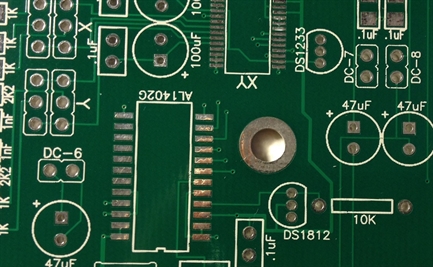
The jumpers labelled DC-6, DC-7 and DC-8 handle the coupling method of channel 6, 7 and 8. If the jumper shorts both pins of the header, the output will be DC coupled. If the jumper is removed the output will be AC coupled. DC-7 and DC-8 connect to left and right audio RCA jacks, respectively. By default, DC-7 and DC-8 are not jumpered. If using channel 7 and 8 for audio, it is highly recommended that these channels be set for AC coupling, otherwise damage to your speaker or amplifier may occur. By default, DC-6 is jumpered (DC Coupled). DC-6 handles the coupling for the AUX CH6 RCA jack on the rear of the converter.
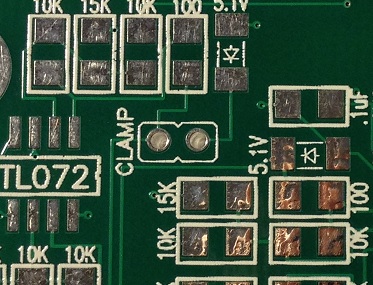
On the board is a single two pin header labelled 'CLAMP', this enables or disables clamping on AUX CH6 RCA connector. By default, this is disabled. When enabled, the output of the Auxilliary channel 6 will be limited to 0V to +5V.
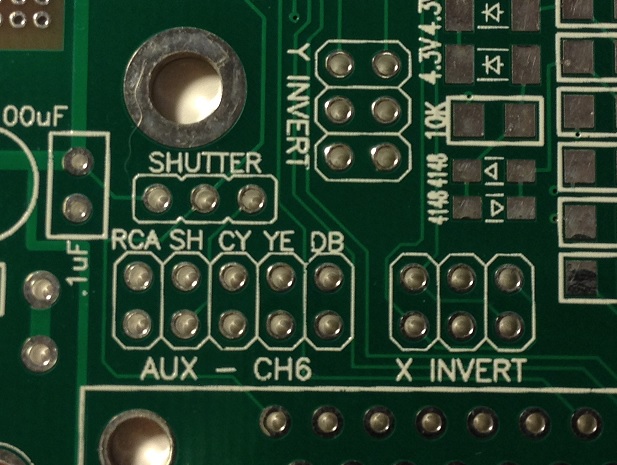
Here you can see a cluster of 4 pin headers. Shutter should be wired to a SPDT switch, X and Y invert should be wired to a DPDT switch. The last pin header is a 2x5. Setting a jumper here will define the output of Auxilliary channel 6. This can be set for the external RCA jack, Shutter (ILDA pin 13), Cyan (ILDA pin 10), Yellow (ILDA pin 9) or Deep Blue (ILDA pin 8).
So, how can the ADAT to ILDA Converter be used to playback laser shows?

The ILDA to ADAT Converter can be directly connected to the ADAT to ILDA Converter. The only real benefit of this is complete electrical isolation since the show material is being transmitted optically. Optical cables of up to 25' have been successfully tested. No configuration is required, plug and play!

The ADAT to ILDA Converter can be connected directly to the ADAT Optical out port on an ADAT. The converter supports 44.1KHz and 48KHz sample rate at up to 24-bit resolution.

The ADAT to ILDA Converter can be connected to a PC IF the PC has an "ADAT OUT" port. There are a few PCI and PCIe adapters that have ADAT IN and OUT ports. For something a little more portable, we recommend the MiniDSP USBStreamer, which is a very small, USB powered device that supports ADAT IN and OUT for both recording and playback of show material. More information on the MiniDSP USBStreamer can be found here: MiniDSP USBStreamer. The ADAT to ILDA Converter has also been tested with a Macbook Pro running Mavericks with the MiniDSP USBStreamer and performed flawlessly!
For more information on show playback with this converter, click here!