
Wave-USB Recording
To record a laser show using the Wave-USB, you will need an application that supports ASIO. We recommend using N-Track, which is an inexpensive program that has many capabilities. Below are step-by-step instructions for configuring N-Track.
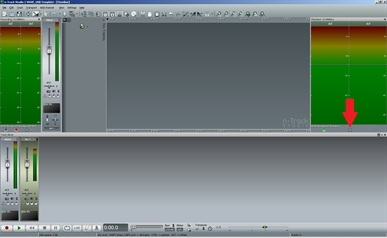
One very important thing to remember is that clipping can cause some very undesireable results. Clipping is indicated by a bright red, quick flashing bar located above each input and output channels. The template file, available below, will prevent output clipping. Input clipping is controlled by the device you have attached to the Wave-USB. If you find that the clipping alarm is flashing, you will want to reduce the input gain for that particular channel.
One very important thing to remember is that clipping can cause some very undesireable results. Clipping is indicated by a bright red, quick flashing bar located above each input and output channels. The template file, available below, will prevent output clipping. Input clipping is controlled by the device you have attached to the Wave-USB. If you find that the clipping alarm is flashing, you will want to reduce the input gain for that particular channel.
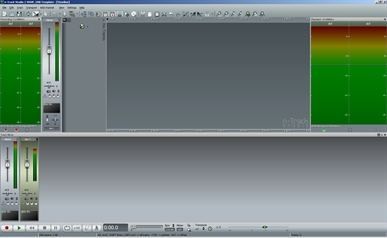
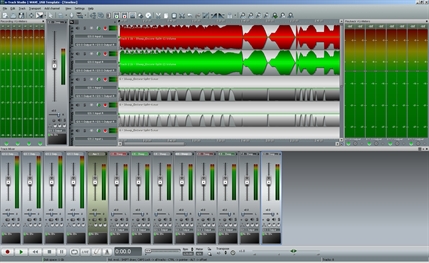
When you first open N-Track, it should look similar to the pic on the right. The VU meters on the left indicate 2 input channels and the VU meters on the right indicate 2 output channels. The first thing you need to do is set the ASIO driver and select the USBStreamer for input/output.
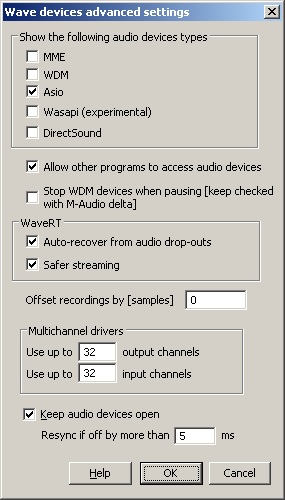
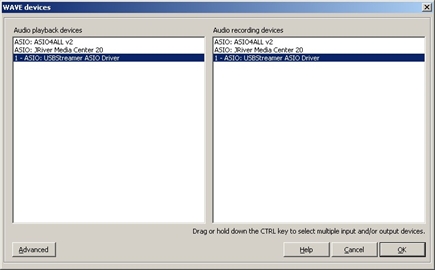
From the top, select 'Settings' then 'Audio Devices'. This will bring up a window labelled 'Wave Devices'. From here select 'Advanced'. On the 'Wave Devices Advanced Settings' window make sure 'ASIO' is checked as the audio device type. Select OK, this will take you back to the 'Wave Devices' window. Select 'ASIO: USBStreamer ASIO Driver' for both playback and recording and select OK.
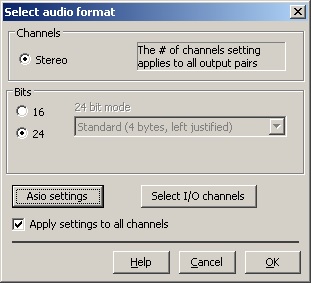
On the main N-Track screen, look to the VU meter on the right side and click on the gear icon. This will bring up the 'Select Audio Format' window. From here, click on 'Select I/O Channels'.
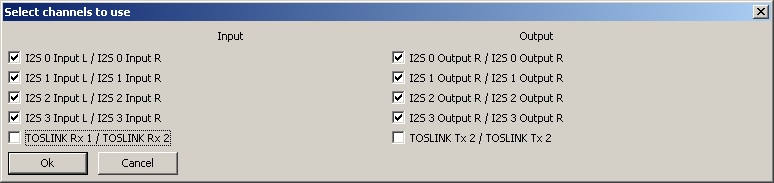
This will open a window labelled 'Select Channels to Use'. Make sure all the I2S channels are selected for both input and output. The TOSLINK channels should be unchecked as they are not used by the Wave-USB.
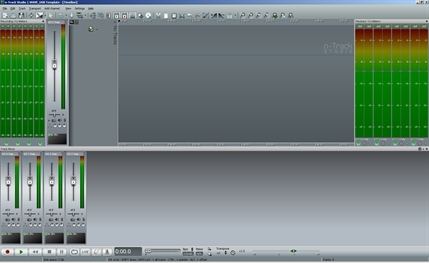
N-Track should now appear similar to the pic on the right. You will notice that there are now 8 VU meters on the left and 8 VU meters on the right. The VU meters on the left indicate input and the VU meters on the right indicate output.
Now you will want to load the Wave-USB recording template. To download the template, click the link below.
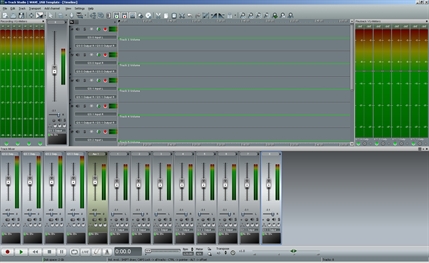
To load the template, click File > Open, then select the template file and click open. N-Track should now appear like the pic to the right.
N-Track is now ready to record with the Wave-USB. To start a recording, click the record button at the bottom left. If you would like to watch whats being recorded, you can click the 'Live' button at the bottom of N-Track. This will route the input to the output of the Wave-USB. This will allow you to watch what's being recorded thru the Wave-USB.
Once the recording is complete it will need to be saved. There are a couple steps to ensure the file is saved properly. From the menu, select 'Save As'. Type of file name, change the 'Save as Type' to 'Wave', then select save.
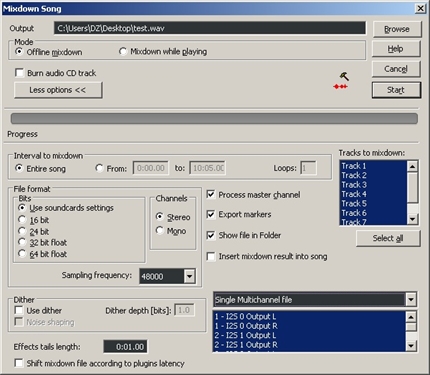
You will now see the 'Mixdown Song' window. The most important thing to do here is select the option 'Single Multichannel File' from the drop-down menu at the bottom right. Then select 'Start'. This will create an 8 channel wave file that's ready for playback!