
Wave-USB Player
The Wave-USB Player was developed for iOS and requires iOS version 26. The app was created as a way to playback pre-recorded laser shows in the 8-channel wave file format directly from an iPhone or iPad with numerous controls over the output. This page will provide a quick overview of the features of the Wave-USB Player.
This app was designed specifically for use with the Wave-USB or the Wave-USB Pro. This app will likely work with any USB multi-channel audio device that has support in Apple's Core Audio. The Wave-USB has safe-guards in place to keep the audio signals contained within industry standards for connection to a laser projector. If you use some other hardware you are doing so at your own risk.
The standard file format for an 8-channel wave laser show is:
Channel 1 - X position data
Channel 2 - Y position data
Channel 3 - Red color data
Channel 4 - Green color data
Channel 5 - Blue color data
Channel 6 - Auxiliary, can be used for SMPTE
Channel 7 - Left Audio
Channel 8 - Right Audio
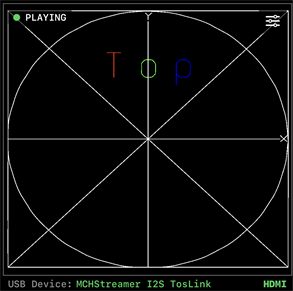
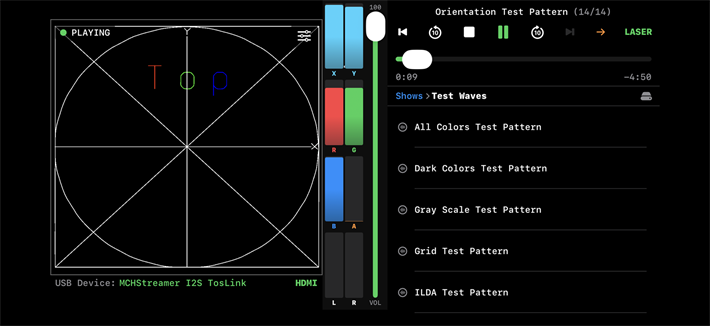
On the left is the Preview window. This window will show the X/Y RGB show regardless of having a USB multi-channel device connected. With no USB device attached, audio channel 7&8 are routed to the iOS device speakers.
The bottom left shows a connection to a USB device. There are two different USB devices used in the Wave-USB products.Either the USBStreamer or MCHStreamer. Both work identically in the Wave-USB.
Bottom right shows connection to HDMI. With an Apple USB-c to Digital AV adapter, it's possible to connect an external monitor. When connected, the contents of the preview window are only displayed.
Top right is the access button to the control panels.
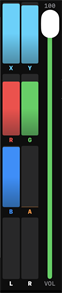
The image to the right are VU meters for the 8 audio channels. The vertical slider only affects audio channels 7&8.
The bottom left shows a connection to a USB device. There are two different USB devices used in the Wave-USB products.Either the USBStreamer or MCHStreamer. Both work identically in the Wave-USB.
Bottom right shows connection to HDMI. With an Apple USB-c to Digital AV adapter, it's possible to connect an external monitor. When connected, the contents of the preview window are only displayed.
Top right is the access button to the control panels.
The image to the right are VU meters for the 8 audio channels. The vertical slider only affects audio channels 7&8.
The transport section is fairly standard. When a USB device is not detected the "Laser" icon is grey. When connected, the laser icon is green. In this state, audio will play thru the USB device however, X/Y RGB are disabled. Tapping the laser icon will change to a flashing red, indicating output is enabled.

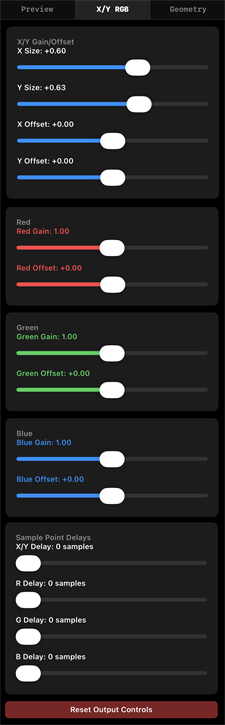
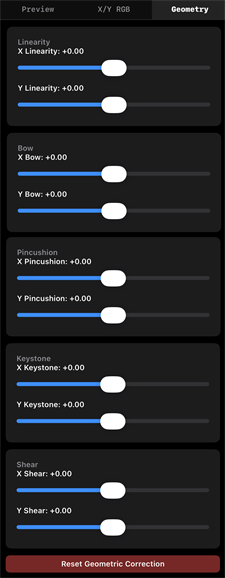
These are the 3 control panels, accessed by clicking the button in the preview window. The Preview CP only affects the preview window and the HDMI output. X/Y RGB CP and Geometry CP only affect the output of the laser projector. These settings are persistent.
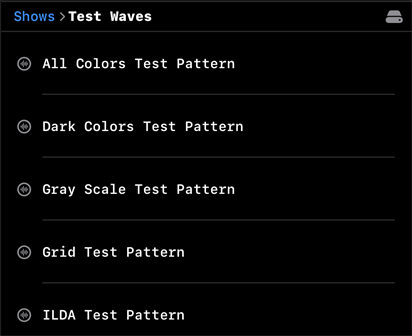
Shows can be organized in folders, the folders can contain individual songs or an individual, full length show file. If a folder has numerous songs it's best to organize them either alphabetically or numbered (ie: 1-<songname>, 2-<songname>, etc.)
Shows or individual songs can be added directly to the storage of your iOS device or streamed live from a USB key.
Selecting the drive icon at the top right of the playlist will allow you to access a USB attached key. The streaming from the USB key while playing a show can be done simultaneously. This helps to reduce storage usage on your iOS device.
Play current folder to the end.
The Playlist can function in a couple different ways. When a song is selected, the playlist will show this file as blue. When playing, the file will show as green. When a song is playing, you can select a "play next" song within the same show folder or jump to a different folder. This newly selected song will show up as red. When the current song completes and if the playback mode (shown to the left) isn't set to loop the current file or stop at end of file, the show will proceed to the next selected (red) file.
Loop currently selected file
Repeat folder
Stop at end of file
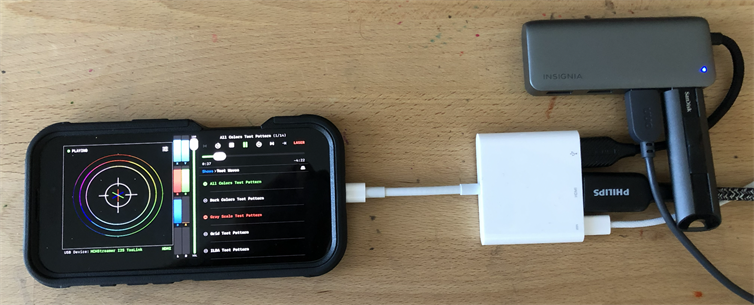
This is the current setup that I am using. It doesen't need to be this complex. A simple USB-c to USB-a cable, connected to a Wave-USB with shows loaded to the iOS device is the minimum requirement. With the configuration shown above, you can output to an HDMI monitor, output to laser with shows stored and streamed live from a USB key.