
Record a Laser Show to PC or MAC

Here we will discuss recording laser shows with the ILDA to ADAT Converter. If you plan to record a laser show to a PC to create a multichannel wave file, aside from needing the ILDA to ADAT Converter you'll also need an adapter that supports ADAT Optical. There are several devices that support ADAT Optical ranging from PCI, PCIe and USB devices. For ease of use and portability we recommend the MiniDSP USBStreamer.
There are two very important things to remember when recording a laser show:
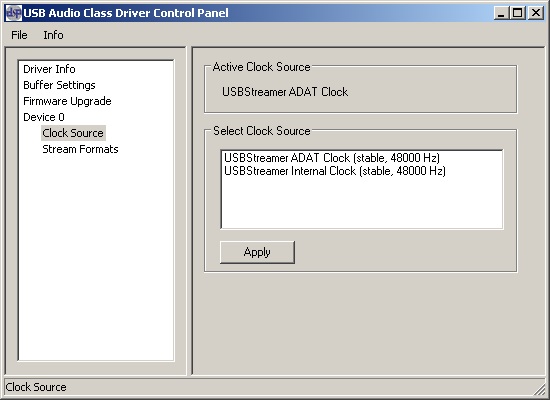
- Location of the Master Clock - To successfully record with the I2AC, it will need to be set as the master clock. Failure to do so can cause drop outs, and other undesireable effects, in the recorded media. Selection of the master clock is done at the driver level of the ADAT Opical device you are using. If you're using the MiniDSP USBStreamer, the master clock selection is made on the USBStreamers Control Panel. The software you use to make the recording (N-Track or Audacity) generally has no control over master clock selection.
- Clipping - To maintain the highest quality signal being recorded, it's very important to prevent clipping of the recorded signal. Clipping can cause undesireable results in the recorded laser show. Clipping can be monitored in the software you use to record the laser show (N-Track or Audacity).
If using Windows Vista or MAC OSX, Audacity is able to recording multichannel wave files. If using Windows 7, you'll need to purchase a program such as N-Track for multichannel recording. I typically use N-Track to record show material and Audacity to edit show material. This is just my personal preference, you may find that N-Track is much easier to use for recording and editing. Below I will show the setup of both Audacity and N-Track for recording a laser show.
Audacity Configuration
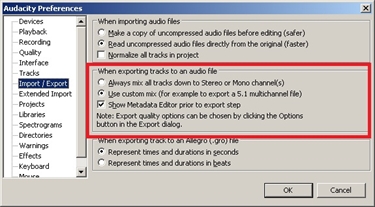
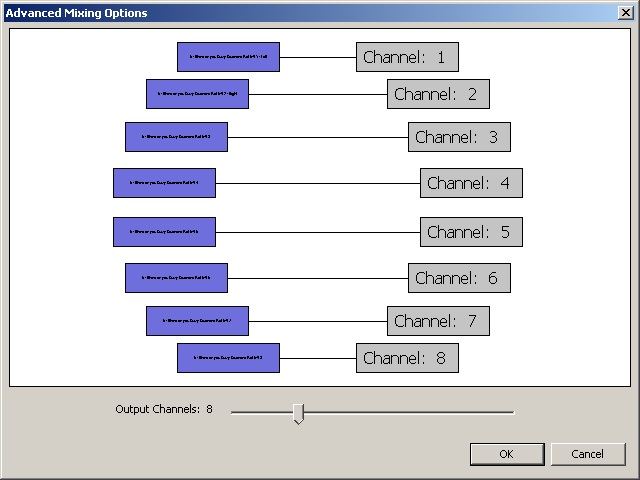
Under Audacity Preferences, select 'Import/Export'. Be sure to select 'Use Custom Mix'. This allows for multichannel wave files, otherwise your newly recorded 8 channel wave file will be mixed down to 2 channels.
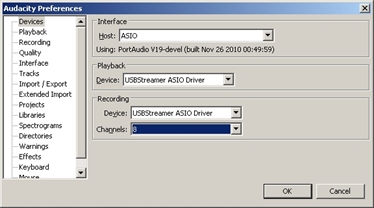
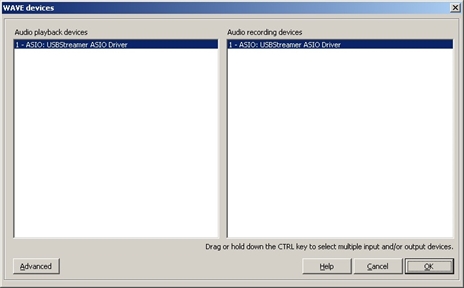
Under Audacity Preferences, select 'Devices'. For Windows, it's important that the Host is set for ASIO. On a MAC the Host is set for Core Audio. In the recording box, select the USBStreamer or other ADAT Optical compatible device and set the number of channels to 8.
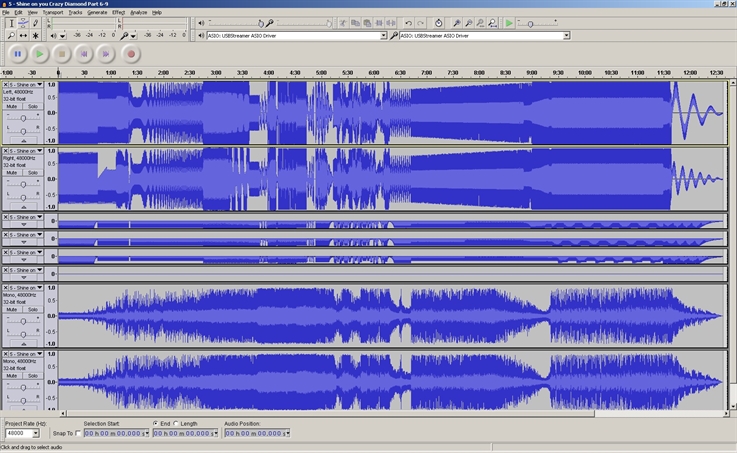
After you've completed the recording you can edit the wave file. There are numberous utilites in Audacity to make changes to the file. Now it's time to save the file. To save the file you will want to select File, then Export. From here you can name the file and select the file format. Wave files are uncompressed and rather large, if you prefer a compressed file format, we recommend the FLAC file format. The next screen is where you can reassign the tracks, the default settings should be fine however, if you wanted to assign the red color channel to blue and green, it can be done here.
N-Track Configuration
The first thing to do is to set ASIO and the USBStreamer as the playback and recording device. You may have a number of other devices on the list, mine is limited due to a setting under the advanced tab to just show the ASIO devices. Select 'Settings' then 'Audio Devices' to get to this screen to set the ASIO device.
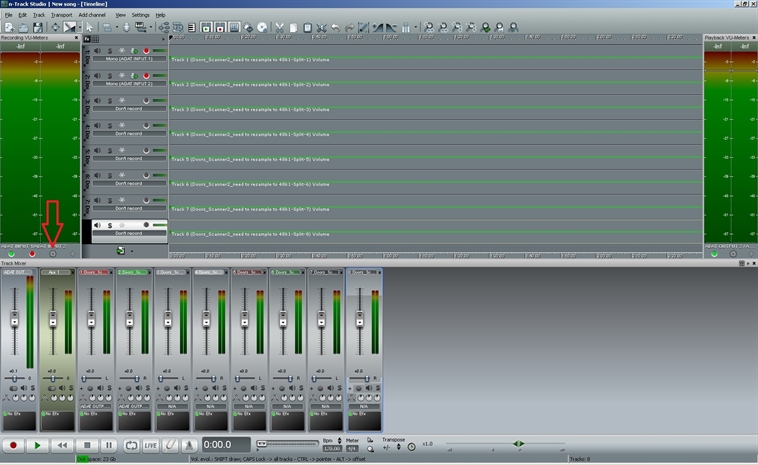
At this point, you screen may look something like the pic above. Just below the record or playback VU meter, you should see a small gear for settings. Click the gear and you will be presented with an 'Audio Format' window. From here select 'Select I/O Channels'. Place a check mark on all input and output channels.
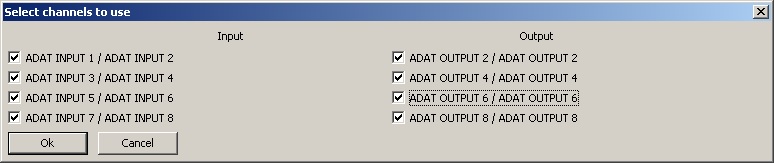
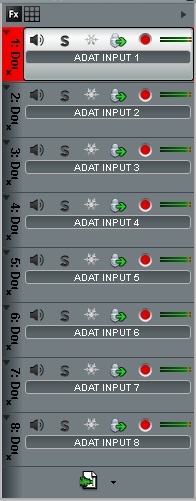
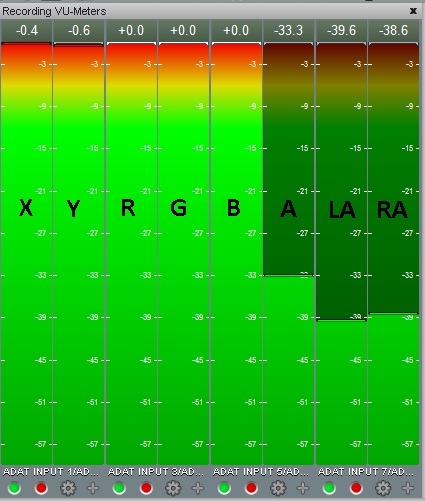
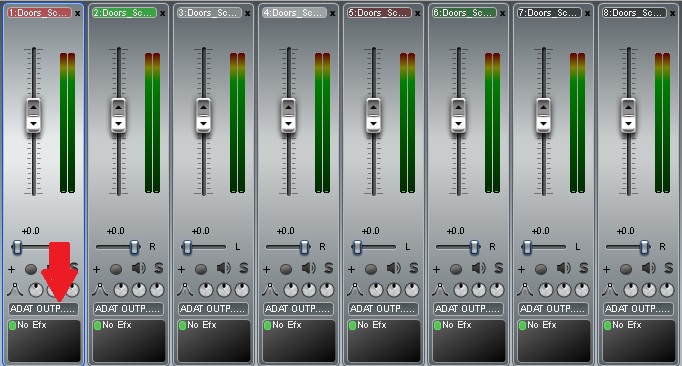
Next, you will want to make sure the input channels are assigned to the right tracks. To the left, you can see the top track is assigned to ADAT input 1, which is the X-Axis, and so on. This ensure proper recording of the tracks. If you have an ADAT to ILDA converter, while you're recording you can monitor the recorded data by setting an ASIO out as shown below. By clicking on the button below the arrow, you will notice 4 options, ADAT2/ADAT2, ADAT4/ADAT4, ADAT6/ADAT6 and ADAT8/ADAT8. The first 2 channels will need to be set to ADAT2 with the pan sliders (next to the arrow)either fully left or fully right.
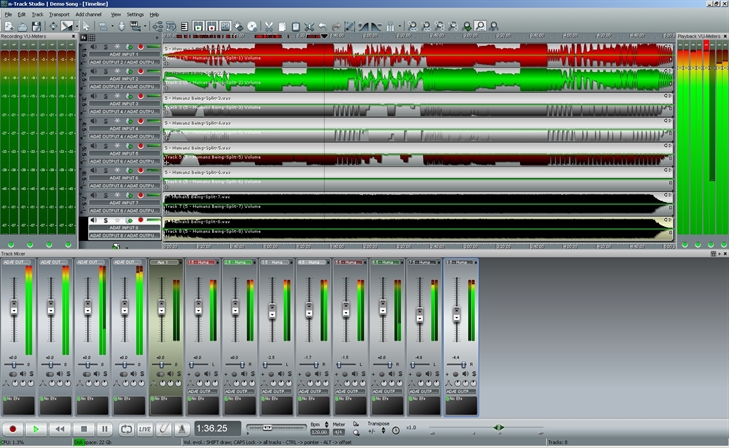
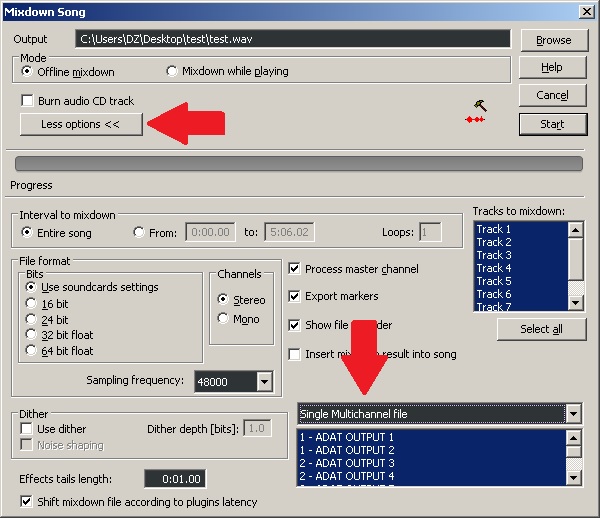
After recording, you should now have something similar to the pic above. Now it's time to save the file. Select 'File' 'Save As', be sure to select wave as the file type. On the next screen, select 'More Options'. Here we will want to select 'Single Multichannel File' and click start. And that's it!
Click here to download a template for N-Track that will automatically assign tracks to the proper ADAT channels